How to Prepare Yerba Maté: The Four Best Methods
Yerba maté is already one of the most popular drinks in South America and quickly gaining attention around the world as an alternative option to coffee.
This stimulating tea has a unique method of preparation involving a special cup (gourd or maté) and filtered straw (bombilla).
In this article, we’ll explore the 4 primary methods of preparing yerba maté — starting with the traditional method. Other methods we’ll cover include the french press method, the tea bag method, and cold brew yerba maté.
We’ll finish with some other herbs and ingredients you can mix with your yerba maté to improve the flavor or effect profile even further.
Let’s jump straight into it.
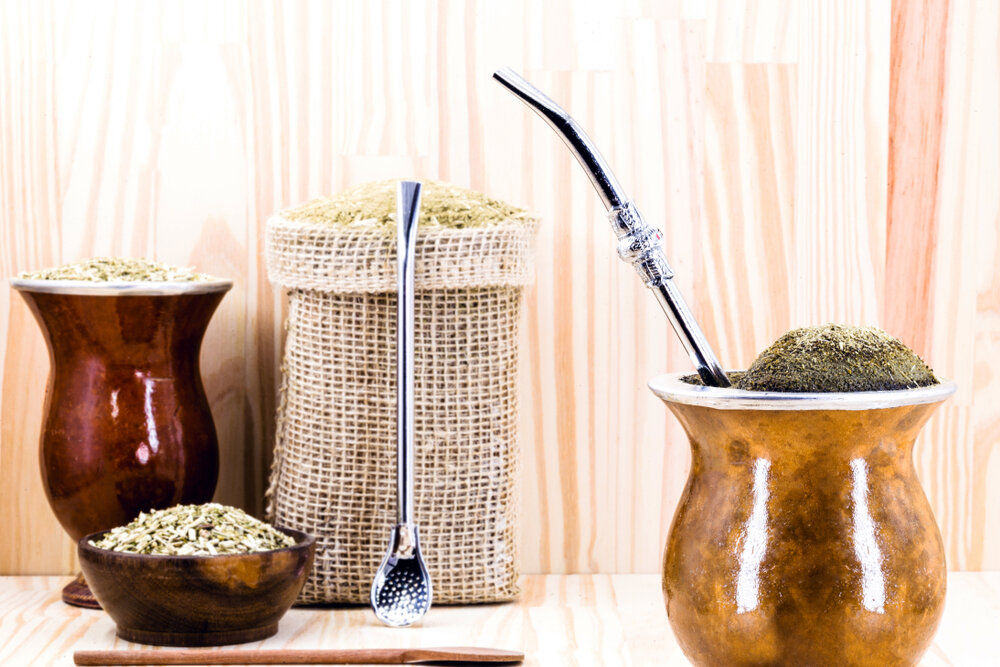
Method #1: The Traditional Method (Using a Gourd & Bombilla)
By far, the most popular (and authentic) way of drinking yerba maté is to follow the centuries-old preparation style using a bombilla (filtered straw) and maté (gourd or cup).
Here, we’ll cover the step by step process for preparing yerba maté the traditional way.
Keep in mind that this process can vary slightly from one culture to the next — but the basic principles remain the same.
What You’ll Need:
Your favorite brand of yerba maté leaves
A Gourd or maté cup
Bombilla
Hot water
A thermos
A small amount of cool water

Step 1: Fill the Maté Cup or Gourd
To get started, add your dried yerba maté leaves directly to the cup or gourd. You should aim to add between 50% and 70% of the cup with leaves. The more leaves you add, the stronger the taste.
Step 2: Cover the Top With Your Hand & Shake
Next, place your palm over the top of the cup to hold the yerba inside. Now flip it upside down and give it a few shakes.
This step is done to remove the polvo — which is a fine yerba maté leaf dust that adds bitterness and can clog up your bombilla. Some yerba matés will have more polvo than others, and it’s not always a bad thing. The polvo adds a lot of punch in terms of the energy-boosting effects of the herb.
Once you’ve given your yerba maté a few shakes, flip it upright again and try to give it a 45-degree slope. You should have a mountain of yerba on one side of the cup, and a void on the other (this is where the water will go).
Step 3: Pour Cool Water Into the Cup
Before you add hot water it’s important to rehydrate your yerba maté leaves with some cooler water (lukewarm or cold will work). This is referred to as your dummy water.
This step protects the nutrients and antioxidants in the leaves.
Pour some water into the reservoir you made in the second step and give it a minute for the leaves to absorb it.
Step 4: Insert the Bombilla
With your yerba maté now moist, you can insert the bombilla into the reservoir and slide it into the mountain of yerba on the other side.
Give the bombilla a little wiggle to make some room under the mountain of yerba.
You can also use the bombilla to compress the mountain slightly to help it retain its shape. This is easier to do with a flat bombilla bit will work with any style.
Step 5: Pour the Hot Water for the First Wash
Everytime you fill the maté gourd with water, it’s referred to as a wash.
Pour the hot water from your kettle or thermos directly into the reservoir of the yerba maté until it almost reaches the top. The perfect pour will leave the very top level of the yerba maté mountain dry.
Step 6: Drink Up!
Once you’re done pouring, give it a few seconds to diffuse and you're ready to drink!
Drink by sipping the yerba through the bombilla until you hear a slurping sound. This means the maté is empty and needs to be refilled.
Step 7: Rinse & Repeat
For the rest of the session, you can just keep refilling the maté with water from your thermos, drink it up, and repeat the process.
You can usually get about 15–20 washes from a single cup of maté.
Every now and then when the maté starts to lose its taste you can take the bombilla out and place it into the other side where the mountain is. Move the pile of yerba over to the other side and shape it with the bombilla until it gets its shape back. Now you’re ready to start drinking again and the yerba maté will be stronger. You can usually do this once or twice to refresh the maté.
Method #2: French Press
As with any tea, you can always use a french press. This method is the easiest method and makes an excellent cup of yerba maté tea.
Most people have a french press at home for making coffee or tea so this is also the most accessible method of making yerba maté.
Here’s how to make the perfect cup of yerba maté tea with a french press.
What You’ll Need:
A french press (any size will do)
Your favorite brand of yerba maté leaves
Hot water
Small amount of lukewarm water
A cup or mug

Step 1: Fill Your French Press With Yerba Maté
First, you need to fill your french press with yerba maté. The amount you need to add depends on the size of your french press and the strength of tea you’re aiming for.
For a mild brew — add about 1 tablespoon of yerba maté per cup (250 mL) of water.
For a strong brew — add 2 tablespoons of yerba maté per cup (250 mL) of water.
Step 2: Add Some Cool Water
Just like the traditional method, it’s a good idea to add a small amount of cool water to the leaves first. This is done to rehydrate the leaves and protect the nutrients contained inside from damage.
Add just enough cool or lukewarm water to wet the leaves without soaking them completely.
Let this sit for about 30 seconds before moving on to the next step.
Step 3: Add Hot Water
Now it’s time to add hot water. The ideal temperature is about 80 degrees Celsius (176 Fahrenheit). The easiest way to get water around this ideal temperature is to take it off the heat as soon as you start to see bubbles forming at the bottom.
Avoid boiling water. This can damage some of the compounds in the leaves and makes the tea much harder to drink.
Once your water is ready, fill the french press up to the top and let it sit for 2 or 3 minutes. The longer you let it steep, the stronger the tea will get.
Step 4: Pour Into Cups & Drink Up
Once the tea is ready, press the filter down and pour your freshly brewed yerba maté into cups for you or your guests.
You can usually get about two or three brews from a single set of leaves so when you’re done feel free to add more hot water to make another cup.
Method #3: Teabags or Strainer
You can buy yerba maté tea bags directly, or make your own with paper or cotton tea bags. Both methods are very simple and make a really nice cup of yerba maté tea.
What You’ll Need:
Your favorite brand of yerba maté leaves
A strainer or teabag
Hot water
A small amount of lukewarm water
A cup or mug

Step 1: Fill the Teabag or Strainer With Yerba Maté
This step is only necessary if you’re making your own tea bags. You can also purchase pre-filled teabags.
Most tea bags will hold a set amount of tea, so for these you can just fill them up to the recommended amount. This usually works out to about a tablespoon of tea.
If you;re using a strainer you should aim for about a tablespoon of yerba maté leaves per cup. You can add more or less depending on how strong you like your tea.
Step 2: Pour Cool Water Over the Tea
Before you add the hot water, make sure to douse the tea with some cool water first. You don’t need to add much, just enough to get the leaves wet before adding the hot water.
Give the leaves a few seconds to soak up the water before moving on to step 3.
Step 3: Add Hot Water
Fill your cup up with hot water that was taken off the heat just before it reaches a boil. Water that’s too hot (boiling) can make the tea more bitter and may damage some of the compounds in the tea.
Step 4: Let is Sit for 2 to 4 Minutes
BNow it’s time to let your tea steep for a few minutes. I usually let it sit for around 2 minutes, but some people prefer to let it sit a little longer. Anywhere between 2 and 4 minutes should do the trick. The longer you let it brew, the stronger the flavor.
Step 5: Drink Up
You’re now ready to drink. Take the teabag or strainer out of the cup, sweeten to taste, and enjoy!
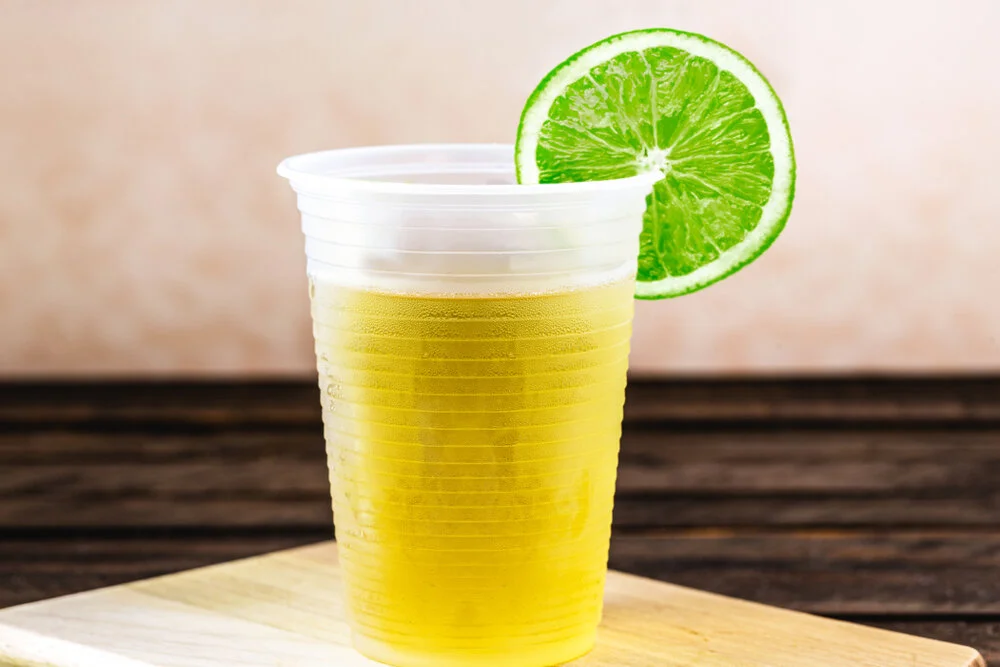
Method #4: Cold Brew Yerba Maté
This is an excellent option for the summer months. Cold-brew yerba maté is very popular in places like Brazil or Colombia where temperatures are very hot for most of the year.
Here’s how to make the perfect cold brew yerba maté.
Step 1: Prepare Some Tea Bags With Yerba Maté
Start by filling up a couple of tea bags with yerba maté tea. You can also choose to order pre-made tea bags or simply use a french press.
Aim for about 1 tablespoon of yerba maté per 250 mL (1 cup) of water.
Step 2: Add Flavorings
This step is optional, but it’s a good idea to add some other ingredients to the cold brew to improve the flavor.
Some popular additions include:
Honey
Fresh fruits
Lemon wedges
Pineapple slices
Other teas (see next section)
My favorite is to add a teabag of peppermint tea and half a lemon sliced into wedges. This gives the final tea a nice cool sensation which is perfect for hot summer days.
Step 3: Add Cold Water & Leave in the Fridge Overnight
Fill up your container with cold filtered water and place it in the fridge overnight. You’ll need to leave the tea for at least 4 hours, but longer is better.
I like to leave it in the fridge overnight for 8 or 10 hours before I take it out to drink in the morning.
Step 4: Sweeten As You Like & Drink Up!
Once the tea is done, you can remove the teabags, or press the french press pump to remove the leaves and pour into cups. You can also fill up a sealable bottle with any excess tea and keep it in the fridge for up to 3 days.
I like to make a large batch at a time so i have enough tea to drink over the course of a few days.
You can add sweetener if you like to make the flavor more enjoyable. Honey or stevia are both excellent options.
Other Herbs to Mix With Yerba Maté
Yerba maté tastes great on its own, but you can also choose to add other herbs to improve the flavor or help direct the effects to meet your goals.
Here are a few of the most popular recommendations to mix in with your yerba maté:
1. Passionflower

Dried passionflower leaves and stems
Passionflower is a tropical vine often found growing nearby or on yerba maté trees in the wild. Unsurprisingly this herb also makes for an excellent addition to yerba maté teas. It has a pleasant floral flavor and a potent relaxing effect.
The relaxing effects of passionflower are perfect for rounding out the effects of the yerba maté and avoiding potential side effects like anxiety or muscle trembling.
Add about 1 part passionflower for every 3 parts yerba maté (25%).
2. Damiana

Dried damiana leaves
Damiana is another plant found in the Amazon rainforest, often growing nearby yerba maté stands. This herb is considered an aphrodisiac, euphoriant, and relaxant. It has a very unique flavor that compliments yerba maté nicely.
In a similar way to passionflower, damiana is added to help offset some of the side effects of the caffeine in yerba maté (anxiety and jitteriness).
Add about 1 part damiana for every 3 parts yerba maté (25%).
3. Schizandra

Dried schizandra berries
Schizandra is known commonly as the 5 flavor berry. It has a very unique flavor that can be described as having aspects of bitter, sour, sweet, salty, and savoury.
Compounds in schizandra stimulate pathways in the liver that metabolizes caffeine. This helps to reduce the amount of time the yerba maté remains active — making it perfect for drinking later in the afternoon, or for people who are especially sensitive to the effects of caffeine.
Add about 3 or 4 dried schizandra berries to your maté gourd before you start drinking.
4. CBD (Cannabis)

Headery CBD Oil
CBD stands for cannabidiol — it’s one of the main health-promoting compounds in the cannabis plant. This particular compound is completely non-psychoactive — meaning it won’t make you high no matter how much of it you use.
CBD is popular alongside coffee as a way to offset some of the common side effects of the drink. The same benefit applies to yerba maté, which also relies on caffeine to produce most of its benefits. CBD and caffeine are a perfect combination because the CBD helps alleviate side effects like anxiety, jitteriness, and difficulty sleeping without reducing the benefits of the compound.
You can find CBD in the form of an oil, capsules, or in raw hemp leaf form. Hemp plants are a type of cannabis that doesn’t produce THC (tetrahydrocannabinol) — which is the main psychoactive ingredient in the plant.
To use CBD, simply take a dose of oil or capsules at the same time you start drinking yerba maté.
Hemp leaves are a great addition to yerba maté tea as well. Add about 1 part hemp leaf for every 3 parts yerba maté (25%).
5. Peppermint

Dried peppermint leaves
The peppermint flavor compliments the flavor of yerba maté nicely. It’s especially good in cold brew yerba maté, but works in regular hot brews as well.
You don’t need much peppermint leaves to impact the flavor — around 1 part peppermint for every 4 parts yerba maté should do the trick (20%).
Where to Buy Yerba Maté
You can order yerba maté leaves online in just about every country. They’re relatively cheap to buy, and are usually sold in ½ pound or 1 pound bags. A ½ pound bag will usually last around a month of consistent use.
Much like green or black tea, each brand has a subtle difference in flavor profile — so I recommend you try a few different brands out before you settle on one.
Here’s some of my favorite yerba maté brand recommendations to get you started:


Author:
Justin Cooke
The Sunlight Experiment