How to Prepare Kava: 5 Techniques to Try Yourself
Kava (Piper methysticum) is a traditional plant medicine from the islands of the pacific ocean.
The root of the kava plant is primarily used for relieving anxiety, supporting sleep, relaxing tense muscles, and combatting chronic stress.
With such a rich history of use, there are some well-established preparation rituals involved with brewing the plant. Many of these rituals remain a common method of preparation today.
In this article, I’ll break down the entire process of brewing kava the traditional way. I’ll cover some simple tips and tricks, and discuss some of the etiquette involved with the practice.
If you’re looking for a faster, more convenient method of preparation, skip ahead to method #2 using the Aluball, or #3 with the blender method. If you want the fastest cup of kava possible, give method #4 a try using instant kava powders.
Let’s get started.

Method #1: The Traditional Method of Brewing Kava
This method has been used to make kava for hundreds of years on the pacific islands. While there are some differences in how the ceremony is performed depending on the island and the culture, the fundamentals remain the same across the many islands of the pacific ocean.
Preparation Time:
15 or 20 Minutes

What You'll Need:
- Powdered kava root (about 10 grams per person)
- A strainer bag
- A large mixing bowl
- Warm water (about 200 mL per 10-gram dose)
- A food scale
Step 1: Weigh Out Your Dose Of Kava
Most of the kava you’ll find online comes in the form of a fine dried kava root powder.
It’s best if you use a food scale to weigh your kava dose instead of measuring spoons because any differences in the grind (coarse or fine) will dramatically change the dose without changing the volume. Weighing the kava is by-far the most accurate method.
The standard dose of kava is around 10 to 20 grams of kava powder per person — and about 200 mL water for every 10 grams of powder.
This is a good starting dose, but you should learn to tweak the dose over time as you see fit. I personally tend to use a little more, closer to 20 grams per dose, or even 30 grams for some of the weaker strains of kava.
Step 2: Add Other Herbs To The Mix (Optional)
This stage is totally optional. Most people don’t add any other herbs to their kava root powder, but I personally like to spice it up a bit with other herbs to help direct the effects of kava I’m looking for.
It’s a good idea to add other herbs while you have the kava on the scale to get an accurate dose of each.
To add these herbs, simply mix them in with the kava powder.
Some Examples of Herbs You Can Mix into Your kava:
| Herb Name | Amount To Add | How it Helps |
|---|---|---|
| Damiana(Turnera diffusa) | 2 grams per dose |
|
| German Chamomile (Matricaria chamomilla) | 1 gram per dose |
|
| Passionflower (Passiflora incarnata) | 3 grams per dose |
|
| Kratom (Mytrugina speciosa) | 3 grams per dose |
|
| Lavender (Lavandula angustifolia) | 2 grams per dose |
|
| Hops (Humulus lupulus) | 1 gram per dose |
|
| Ginger (Zingiber officinalis) | 1 gram per dose |
|
Step 3: Fill The Strainer Bag With The Kava Powder
For the next step, you’ll need a large mixing bowl and a strainer bag (a cheesecloth or stocking will also work).
Add the kava to the strainer bag, place it in a bowl with about 20 times as much water in mL as the weight of kava you used in grams. So for a standard 10-gram dose of kava, you’ll need about 200 mL of water.
If you want the kava to be stronger, use less water. If you want it to be more watery, just add more water.
Don’t use hot water — lukewarm or slightly warm tap water is best. The heat will destroy the active ingredients of the kava.
Now you’re ready to begin mixing!
Step 4: Mix The Kava & Water Thoroughly
Now you just need to mix the kava inside the strainer bag with the water.
The strainer bag is designed to keep the kava powder contained so it doesn’t end up spilling into the water and making a lumpy mess.
To mix, simply massage the bag full of kava with the water and move it around. You’re going to want to mix this very thoroughly, so take the time to mix it around for at least 15 minutes for the best effects.
When this is done, you’ll be left with a brew that has a fresh peppery aroma and looks just like muddy water.
While it may not look very appetizing, this kava is ready to drink!
Step 5: Bula! Time to Drink Up
The final (and most important) step is to drink the kava.
Separate the mixture into individual cups for each person or keep it in one cup if it’s just you — and drink up.
Warning: kava doesn’t taste very good and most first time drinkers will find it hard to drink. It helps to down the drink quickly on its own to get it over with, but some people will add flavoring agents like honey or vanilla extract to make it taste a little better.
The more you drink kava, the better it tastes. I’ve been drinking kava for a few years now and no longer find the flavor an issue. However, when I drink kava with friends who have never had the brew, I always get a few complaints. This is completely normal.
I’ve found that pineapple juice is especially good at masking the kava flavor. Take a drink, and follow it up with a shot of pineapple juice.
Best Kava Root Powders

Kalm With Kava Borogu Kava — Vanuatu
Best Mild & Balanced Kava Root Powder

Root of Happiness Premium Fijian Kava
Best Heady Kava Root Powder

Root of Happiness — Solomon Island Kava Root Powder
Best Heavy Kava Root Powder
Method #2: Using The AluBall
If mixing and mashing kava around for 15 minutes doesn’t interest you, have a look at the AluBall. It’s a modified protein shaker designed for making kava as fast and conveniently as possible.
The AluBall was invented by the founder of a company called Kavafied — one of my favorite brands of kava products in the United States.
Preparation Time:
1 – 2 Minutes

What You'll Need:
- Powdered Kava root
- An AluBall Kava Maker
- Warm Water
Step 1: Fill The AluBall Strainer With Kava
The first step is to fill the included strainer ball with kava. This ball is designed for a single serving of kava, but you should still measure the first dose so you know how much a standard 10-gram dose (or whatever dose works for you) looks like.
You should fill the strainer ball to about 3/4 full of kava powder.
Close and seal the AluBall and toss it in the bottle.
Step 2: Fill The AluBall Bottle With Water
With the strainer ball placed inside, add some water to the fill-line. You can choose to add more or less water as desired.
Less water will make the kava stronger, while more water will make the kava weaker.
You can add water straight away if you’re ready to drink, but if you plan on drinking your kava a later-on, leave the water out until you’re ready to drink.
I usually fill my strainer ball in the morning and leave it in my bag until I’m ready to drink up, then I add the water and move on to step 3.
Step 3: Shake the AluBall Vigorously & Drink!
Just like the traditional method, you need to shake the bottle as much as possible. This does the job of mixing and mashing the strainer bag like the traditional method — only much more efficiently.
The AluBall recommends shaking for about 30 seconds to make a strong brew — but I recommend you shake it for at least a minute to make sure you don’t waste any of your precious kava root powder.
Once it’s done, you’ll end up with a murky brown liquid — it’s now ready to drink up!
You can either pour the kava into cups to share or drink from the bottle directly. The pro series AluBall comes with an included cup lid that’s shaped just like the traditional coconut kava cups.
Get the AluBall

Original AluBall

AluBall Pro

AluBall Pro — Mana
Method #3: The Blender Method
This is a method outlines by Kalm With Kava — another one of our favorite kava manufacturers.
The blender method works in reverse to the traditional method. You add the powder and water to the blender directly and strain it through a filter or cloth after.
Using a blender is very quick, and makes a very strong kava preparation. I’ve found it to be significantly stronger than the traditional method, so I tend to use a little bit less kava powder when making kava with this method.
Preparation Time:
About 1 Minute

What You'll Need:
- Powdered kava root
- A Blender
- Warm Water
- A Food Scale
- A Strainer Bag
Step 1: Measure the Dose of Kava
As with any other method, you need to measure the dose first with a food scale. Aim for the standard 10 to 20 grams per person.
I should note that this method works best with larger doses of kava. It’s great for mixing kava for groups, but you can also use it to make a large batch for personal consumption as well. You can make a large batch of kava and pour it into a bottle to keep in the fridge to pour out doses as you need it over the next day or two.
Step 2: Add the Kava & Water to the Blender & Mix
You may need to add slightly more water for this method than other preparation techniques to avoid having the kava clump up in the blades.
I tend to use about 250 mL (1 cup) of water for every 10 grams of kava.
Mix the kava on the low or medium setting for about a minute until you get the characteristic, muddy look.
Step 3: Pour The Liquid Through A Strainer
You can’t drink the liquid from the blender until you strain out all the fibrous kava pieces. The easiest way to strain it is to pour the kava through a standard strainer bag, cheesecloth, or cloth filter.
I prefer to use a cloth coffee filter to do this but you can get creative and use anything you want. I’ve even seen people use a makeshift filter with an old T-shirt.
The only thing I recommend you avoid doing is using a paper coffee filter. These filters will remove too much of the active ingredients and defeat the entire reason for making the kava in the first place.
Step 4: Pour Into Cups & Enjoy!
Your kava is now ready to drink! Pour it into cups for you and your friends, or fill up a glass bottle and leave any leftovers in the fridge for later.
If storing your kava you should always finish the bottle within about 48 hours after making it. I always add the date I made the kava to the bottle when I put it in the fridge to make sure it doesn’t sit for too long.
Method #4: Instant Kava
This method requires you to use a special form of kava — instant kava.
There are actually two types of instant kava to be aware of:
Micronized kava root powder — kava that’s been ground to a very fine powder
Freeze-dried or dehydrated kava root juice — kava that’s been juiced and dehydrated into a powder form
While both types of instant kava will work, true instant kava is made from dehydrated juice. This form of instant kava has a better flavor and dissolves much more easily in water.
Preparation Time:
30 Seconds to 1 Minute

What You'll Need:
- Instant Kava Powder
- A Coffee Mug or Cup
- Warm Water
Step 1: Measure Your Dose
Just like any form of kava, you have to first assess which dose to use.
Most instant kavas will list the dosage information on the packaging. This is the best source to determine the dose because all instant powders will have different strengths depending on how it was manufactured.
Usually, the dose will say something like ½ tsp per person.
Add this powder directly to an empty cup.
After testing the kava for yourself, you can decide if you want to add a little more or a little less than the recommended dose.
Step 2: Add Water & Stir
Once the powder is in your cup, you just need to add the water and stir it in. Again, you’ll need to follow the directions on the label to determine how much water you need.
My favorite instant kava is from Root of Happiness. This particular brand recommends using ½ teaspoon of kava powder with 125 mL of water.
Make sure you don’t use boiling water — kava is not the same as coffee. Adding hot water will destroy some of the active kavalactones and make the brew weaker. Never use water that’s hotter than your tap water. Ideally, you should use lukewarm water.
Now stir the kava up with a spoon or hand mixer.
Instant kava from dehydrated juice will usually dissolve immediately with a spoon, but micronized kava will need some time to dissolve. You may want to use a small hand mixer to get it to dissolve more quickly.
Step 3: Drink Up!
Now all you have to do is knock it back.
Like most kava, you shouldn’t expect it to taste very good. Kava isn’t a drink made for its flavor — what you’re after is its effects. I find drinking it quickly in one shot is the easiest.
You can also add some other ingredients like honey, agave nectar, or other herbs to flavor. I’ve tried everything, and honestly, your probably not going to be able to make the taste enjoyable on its own. Just mix it up, knock it back, and follow it up with something like pineapple juice or nut milk to wash it down.
Best Instant Kava

Kava SUPREME Instant Powder

Root of Happiness Instant Kava

Kalm With Kava Instant Powder
Method #5: Kava Concentrates

Closeup of thick kava paste
The final method we’re going to discuss for making kava is to use kava concentrates. These are made by isolating and removing the active ingredients of the kava root. To use, simply mix the concentrate with water or nut milk and mix vigorously.
Kava concentrates come in all different formats, but usually, it’s either a fine powder or a paste.
Lower potency kava concentrates are easier to mix by hand (30% kavalactones or less). You can mix these up the same way you would with instant kava powder — but you’ll probably have to spend more time mixing to get it to dissolve.
Higher potency kava concentrates are much more difficult to dissolve. For any kava concentrate with more than about 50% kavalactones, it’s best to take them directly without mixing into the water at all.
Always follow the directions on the label when it comes to dosing this type of kava because the dose will vary significantly depending on how strong the concentrate is. I can’t give you a standard dosage for these products because there is too much variability between brands.
For example, let’s use my personal favorite kava concentrate — which is the Polynesian Gold™ 70% CO2 Kava Extract. Each bag comes with a spoon that measures out an exact dose of 200 mg. To use, take one level scoop from the included spoon, and place it directly in the mouth.
You can either swallow the concentrate right away or let is sit under the tongue for a few moments to make it absorb even faster. It will make your mouth feel numb and tingly for up to an hour after you use it. I enjoy this sensation but if you don’ like it, you can rinse the kava down with water, ut milk, or pineapple juice immediately to reduce this effect.
Preparation Time:
2 or 3 Minutes
What You'll Need:
- Kava Concentrate
- A Coffee Mug or Cup
- Warm Water
Best Kava Concentrates

Polynesian Gold 30% Kava Concentrate

Polynesian Gold 70% Kava Concentrate
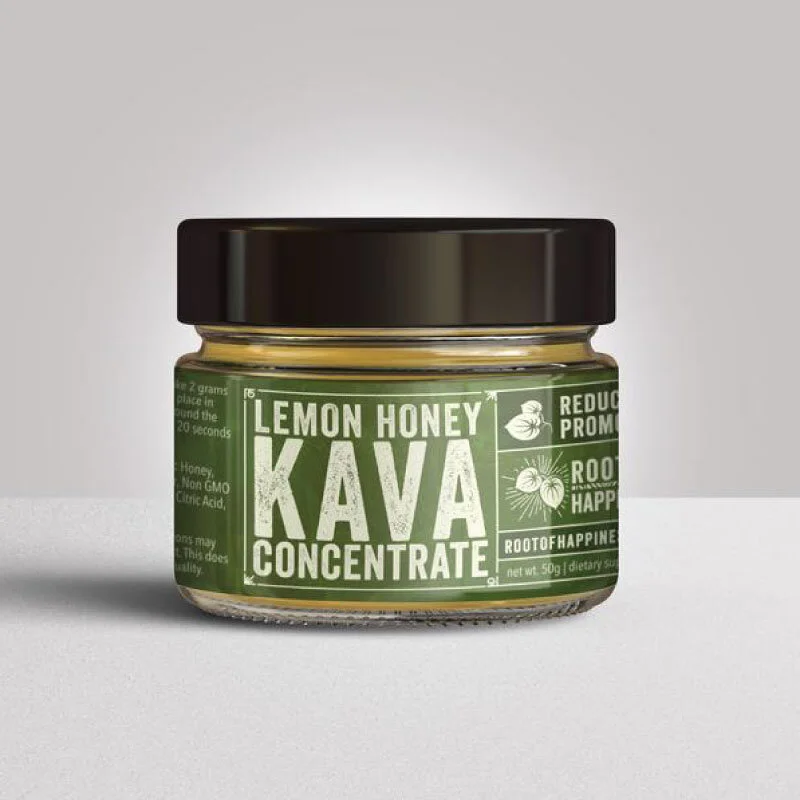
Root of Happiness Lemon Honey Kava Concentrate
Kava Drinking Etiquette
Kava etiquette will vary from one culture to the next, but I’ll cover some of the main points to consider. This is useful to know before you travel to Fiji, Vanuatu, Samoa, or any other kava drinking culture and plant to attend a ceremony. It’s also good to know before going to a kava bar locally or to make the experience more authentic when drinking at home.
Kava is a plant with a lot of history, so there’s a lot of rituals involved with its use.
I encourage you to embrace the traditional applications of the herb to get the most out of it — however, none of these tips on etiquette need to be followed to enjoy kava on your own or with friends.
The only time they become important is when you attend a kava ceremony on one of the pacific islands. Here, you should always respect and follow the local customs when it comes to drinking kava. These customs can change depending on where you are so make sure you ask someone to clarify before you begin the ceremony.

Here are some of the general etiquette points to follow while drinking kava:
Dress modestly when attending a kava ceremony (both men and women)
The oldest member of the group drinks first
The youngest member of the group should prepare each cup of kava by filling it up from the mixing bowl and passing it around to each person individually
You can choose either “high tide” or “low tide” — which refers to a full cup of kava or a half-cup respectively
After receiving your cup of kava, clap once and say “Bula” (Fijian word for hello)
Avoid showing a look of disgust after drinking the kava, even if you don’t like the flavor
Drink the kava in one gulp and pass the cup back so the next member of the group can drink too
As soon as you finish drinking, clap three times and say “mathe” — which is like saying thank you in Fijian

Final Thoughts: Preparing Kava
Kava is one of the few herbs I use on a near-daily basis. The powerful relaxing benefits make kava ideal for just about anybody — especially if you experience a lot of stress or have difficulty sleeping at night.
Preparing kava is simple — the goal is to dissolve the active ingredients into the water. While this is a simple task, the active ingredients in kava aren’t very water-soluble, so you have to work extra hard to get them to dissolve.
With the traditional method, this means spending about 15 or 20 minutes mixing a strainer bag full of kava with water until it turns to a light muddy-brown color.
Other methods have since been developed to make the process quicker and easier.
One of the most popular methods is to use an AluBall kava maker — which works just like a protein shaker bottle but optimized for kava.
You can also use a blender and strainer, or buy instant kava and mix it directly with water using a spoon.
There are so many ways to enjoy kava and I encourage you to try a few methods out for yourself to find what works best for you. There’s really no wrong way of doing it so take the time to enjoy the process and make it part of the experience.
If I missed any kava preparation techniques you think I should add, make sure to comment below!
Bula!
Author:
Justin Cooke
The Sunlight Experiment